Rubik's Cube Guides
3x3x3
Intro
This is the standard Rubik's cube, with dimensions 3x3x3. It is the most common and popular Rubik's cube.
The method for solving is based on the CFOP method.
CFOP stands for 'Cross', 'First 2 layers', 'Orient the last layer' and 'Permutate the last layer'.
Process
- Step 1 - You will start by making a cross on the white face
- Step 2 - Then you will solve the first 2 layers
- Step 3 - Then you will orient (put in the correct direction) the last layer
- Step 4 - Finally you will permutate (put in the correct place) the last layer
Step 1
White cross
Goal
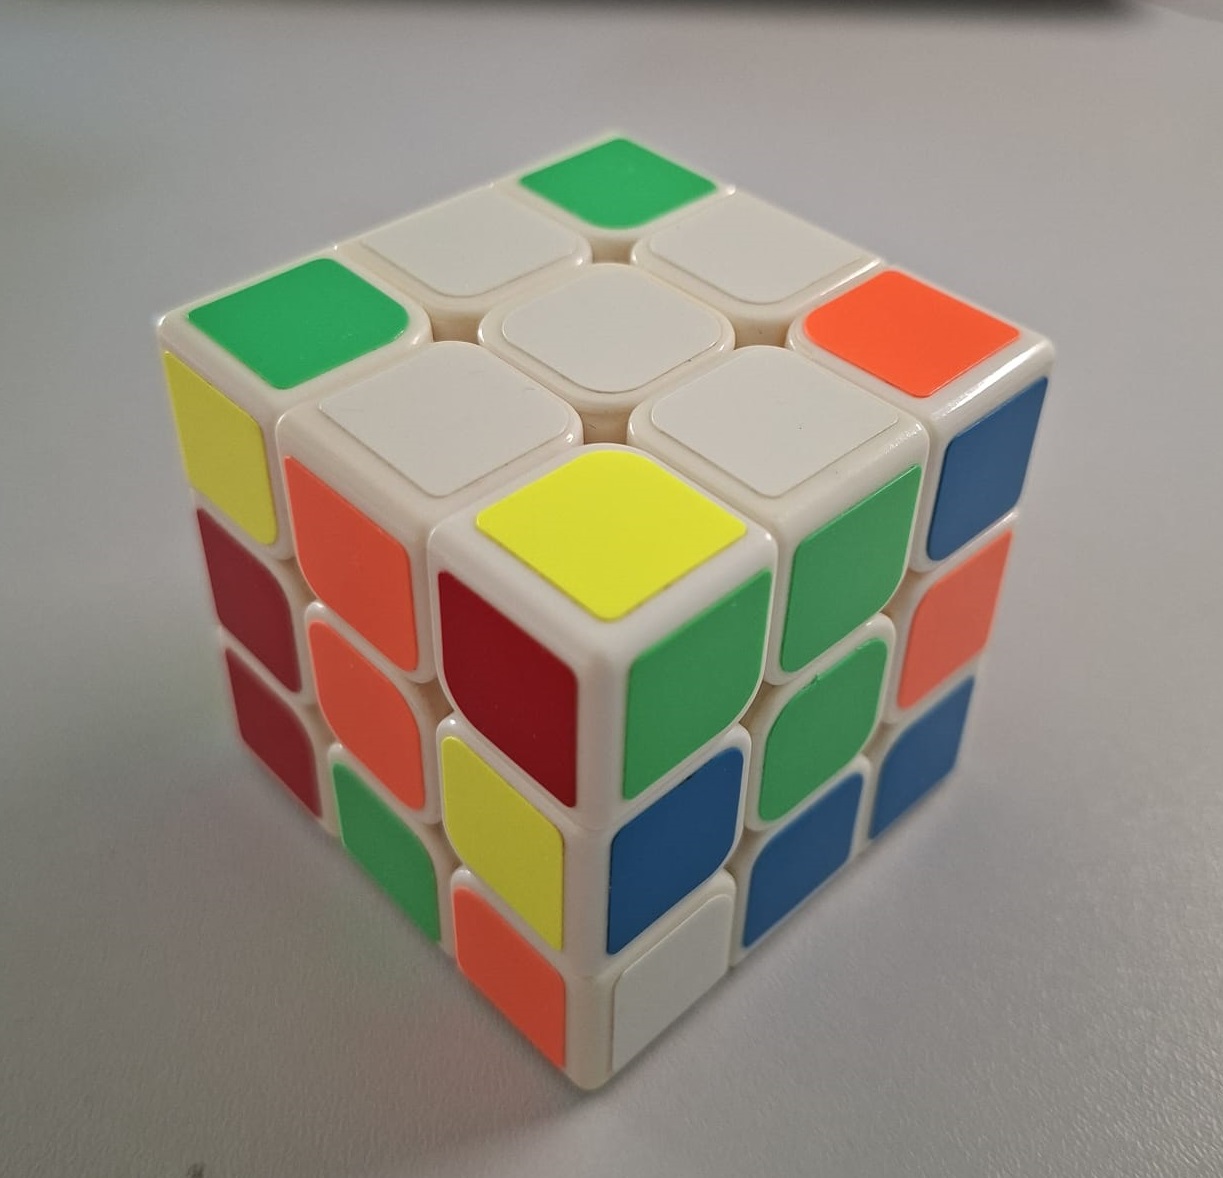
In this step, we want to create a white cross: so the edge pieces next to the white center piece are all white.
We will also make sure to align the edge pieces with the center color on the side.
How?
This step is intuitive, you should be able to create the cross without much problems, if you play around with the
cube.
Tip: if an edge is not aligned with the center color on the side, rotate that side layer 180 degrees, so the edge
piece is next to the yellow center.
Next rotate the layer with the yellow center to position the edge piece next to the correct center color.
Finish by rotating the side layer again 180 degrees, to position the edge piece next to the white center again.
Step 2
First 2 layers
Goal
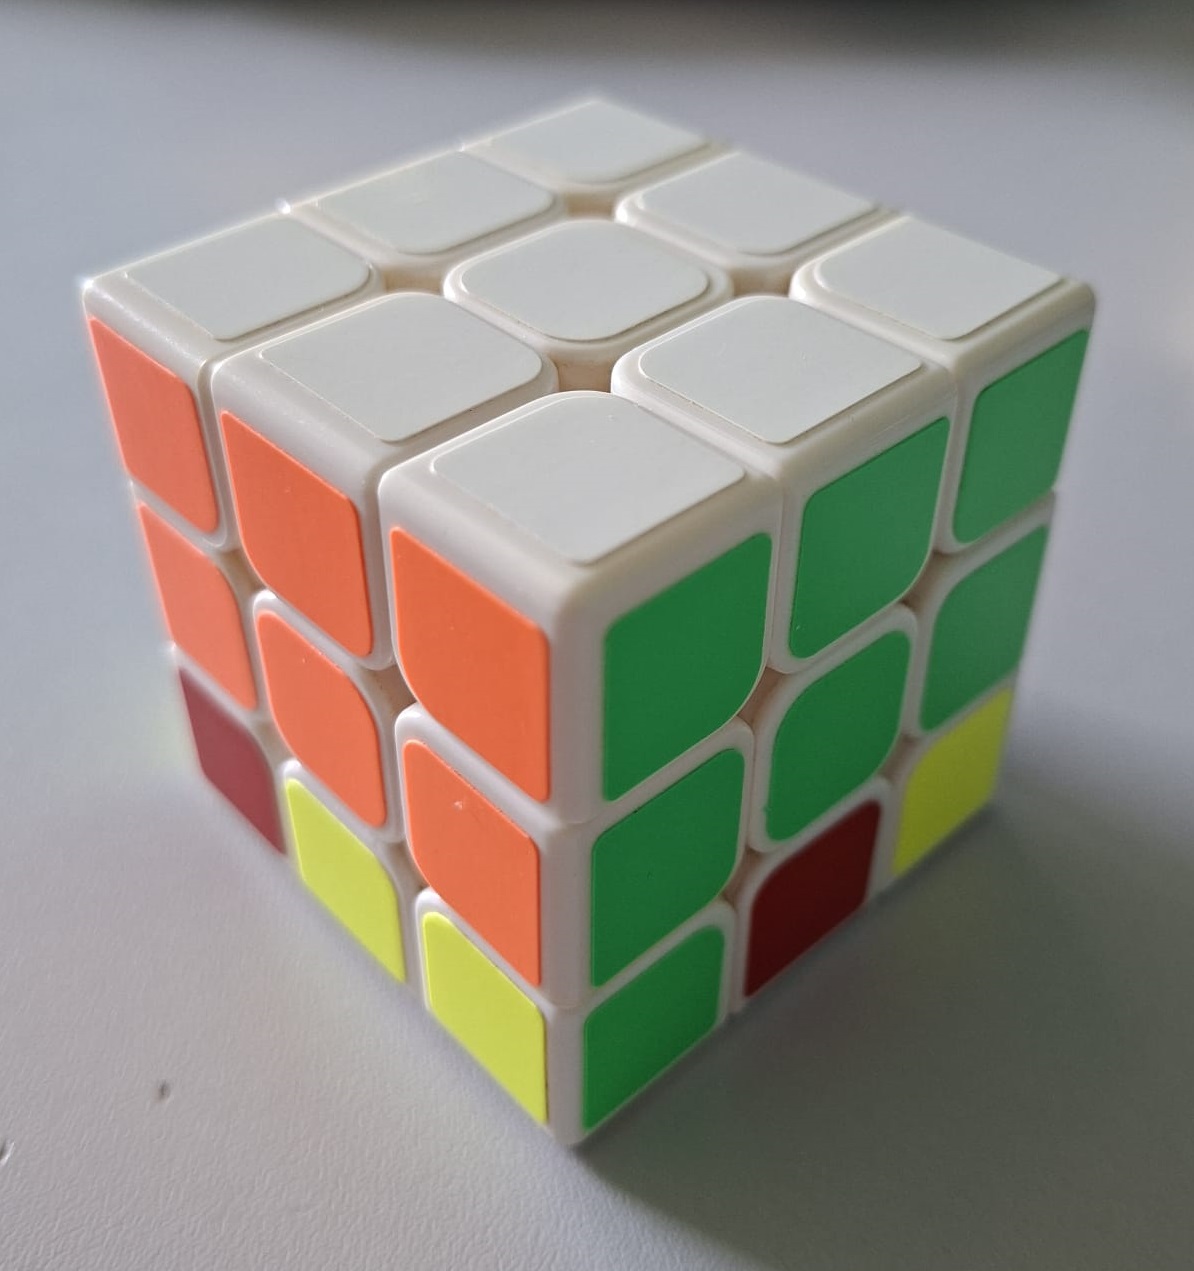
Next we will solve the complete first 2 layers, so the layer with the white center and the middle layer.
Note that we will also align the corners and edges with the correct colors.
How?
In this step it is important to keep track of which layers you rotate, to avoid messing up pieces you already
solved, else you will never finish this step.
You will solve one side at a time, so a combination of a corner and the matching edge piece on the bottom 2
layers.
You start by moving the 2 pieces into the top layer.
From then on, it is important to rotate the cube, so that the 2 center pieces of those colors are facing you.
And you can only use the following combination of moves:
- Right layer: R (UUUUUU....) R'
- Left layer: L' (UUUUUU....) L
So rotating the side layer away from you, a number of rotations of the top layer, followed by rotating the side
layer back towards you.
This way, any color that has already been solved, will not be messed up.
It sounds complicated, but it will become clear soon.
For example: the image shows the setup for red and green.
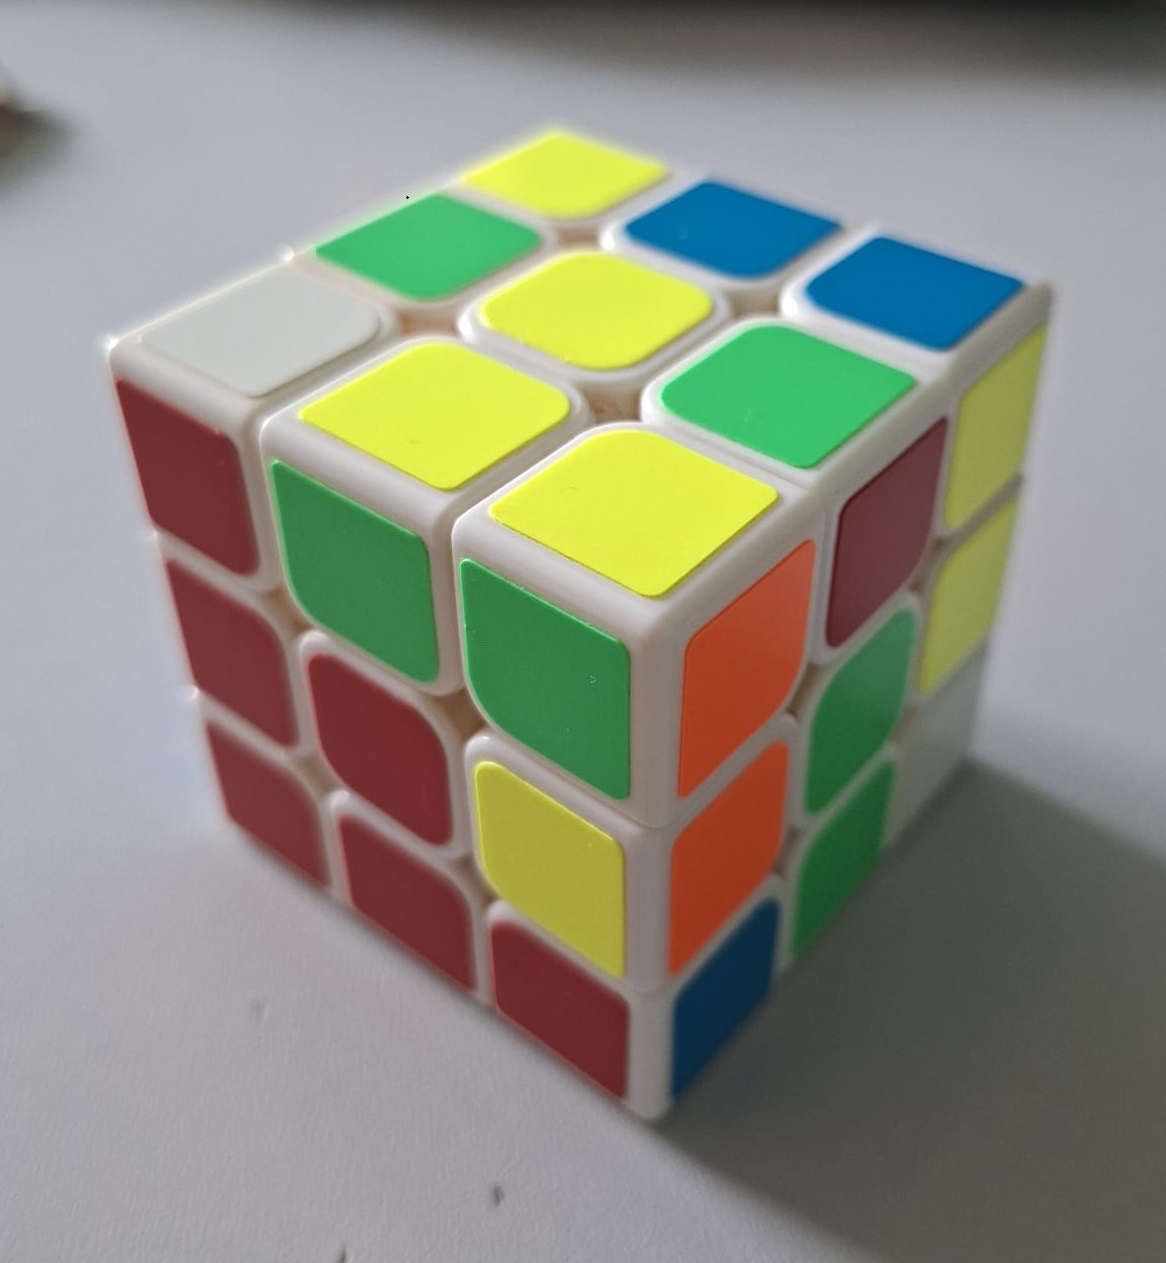
Note that:
- The yellow center is on top
- The cube is rotated so that the red and green centers are facing you
- The red-green edge is in the top layer (on the top-right edge)
- The red-green-white corner is in the top layer (on the left)
At this point, there are 3 possible scenarios.
Scenario 1 - The white face on the corner is on top
As you can see in the picture, the white face on the red-green-white corner is on the top layer.
To solve this side:
- Rotate the top layer to align the edge piece with the color on the side layer.
In the example: rotate the top layer to place the edge piece next to the red center.
- Next, rotate the layer away from you:
In the example this would mean to rotate the left layer away from you.
- Then rotate the top layer to place the corner next to the edge piece: you will see the colors will be
aligned.
- Finally rotate the layer back towards you: this will bring the 2 pieces in the top layer and aligned.
- To put the 2 pieces in the correct position, rotate the top layer, so that the 2 pieces are either on the
left front or right front layer, so that the white face of the corner is not facing you.
- Now rotate the other front layer away from you.
- Rotate the top layer to place the 2 pieces in the correct position.
- Rotate the front layer back towards you.
This will align the 2 pieces and place them in the correct position.
Scenario 2 - The same colors are on top
You can see in the following picture, that red is on top for the corner and edge piece.
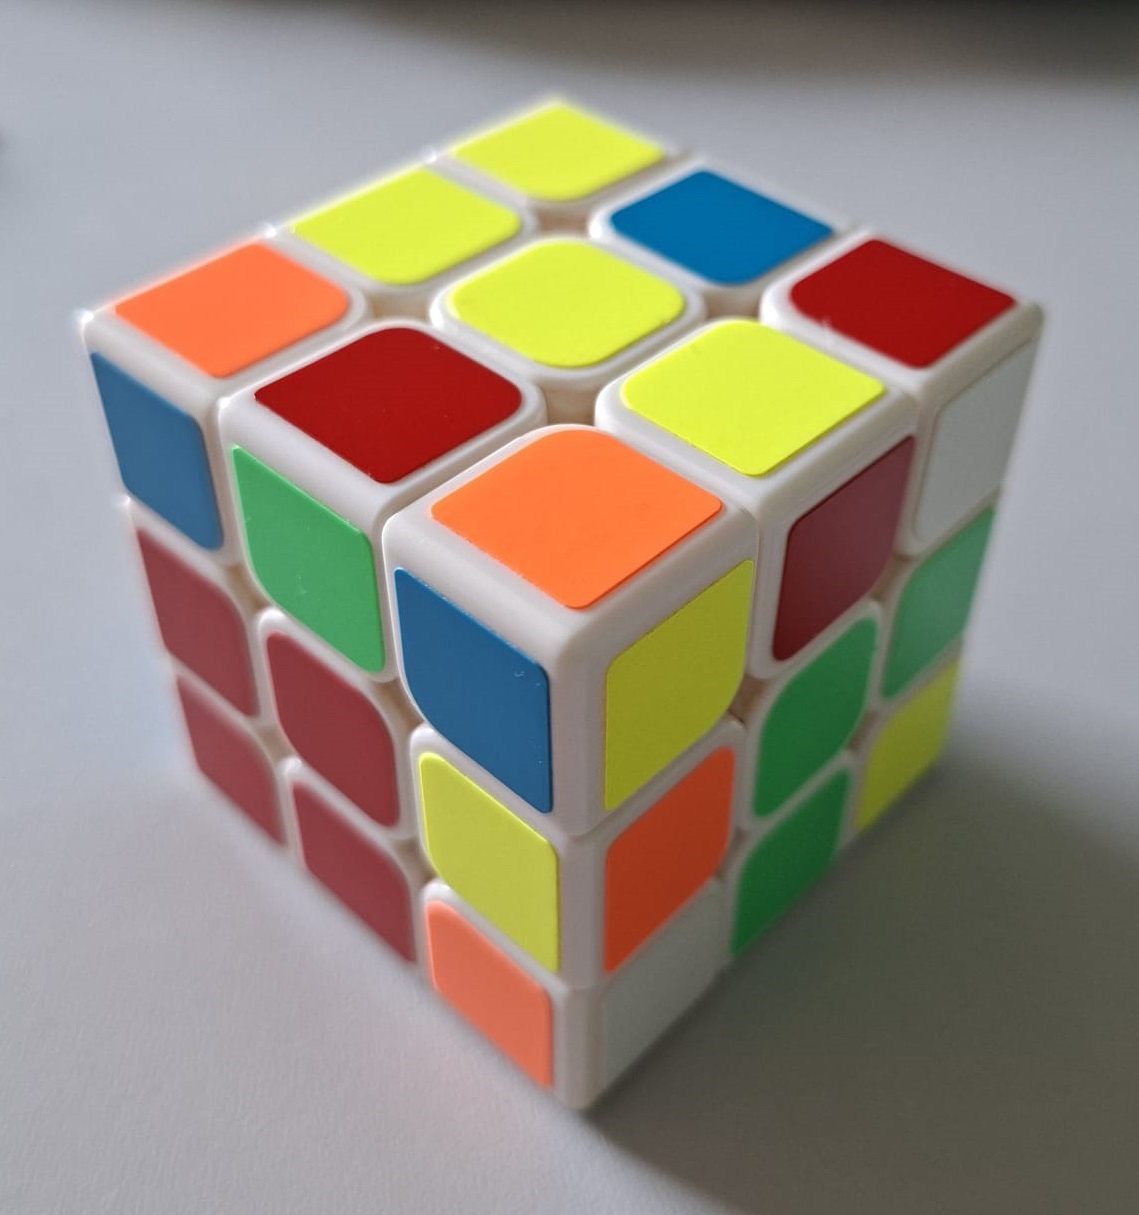
To solve this side:
- Rotate the top layer so that the corner is either in the right column of the right layer or in the left
column of the left layer, ensuring the white face of the corner is facing you.
In the example: this is already the case: the corner is in the right column of the right layer and the white
face is facing you.
- We will need to align the edge piece next to the corner, so this will be on the middle column of the
corresponding back layer.
In the example this will be the middle column of the right back layer.
- Start by rotating the layer with the corner away from you.
- Now rotate the top layer to put the edge in the correct position on the corresponding back layer.
- Finish by rotating the side layer back towards you: this will again align the corner and edge pieces.
- To put the 2 pieces in the correct position, rotate the top layer, so that the 2 pieces are either on the
left front or right front layer, so that the white face of the corner is not facing you.
- Now rotate the other front layer away from you.
- Rotate the top layer to place the 2 pieces in the correct position.
- Rotate the front layer back towards you.
This will align the 2 pieces and place them in the correct position.
Scenario 3 - Different colors are on top
The last scenario is where the edge and corner have different colors in the top layer, as shown here:
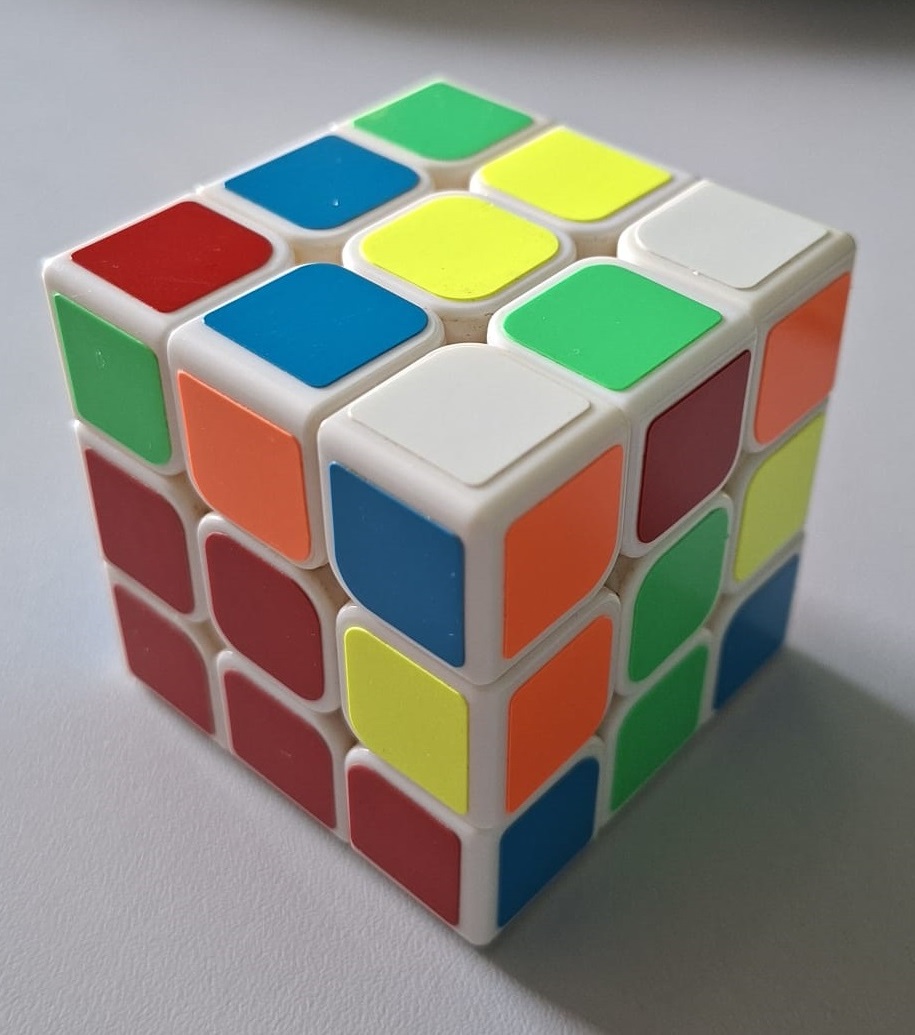
To solve this side:
- Like in scenario 2, rotate the top layer so that the corner is either in the right column of the right layer
or in the left column of the left layer, ensuring the white face of the corner is facing you.
- Rotate the layer with the corner away from you.
- Now rotate the top layer, so that the edge piece is in the center of the other front layer.
- Rotate the layer with the corner back towards you.
- At this point, the pieces are ready for aligning: rotate the top layer to place the corner in the top front
position.
- Rotate the corner towards the edge piece: this will align the 2 pieces by color.
- Rotate the top layer to move the corner towards you.
- Rotate the layer containing the 2 pieces back towards you.
This will align the 2 pieces and place them in the correct position.
Conclusion
This part looks complicated, but play around with the scenarios and you will find out it is actually
straightforward and intuitive.
Step 3
Orient the last layer
Goal
The next step is to make the top layer all yellow on top. This consists of 2 steps: making the yellow cross and then
finishing the yellow face.
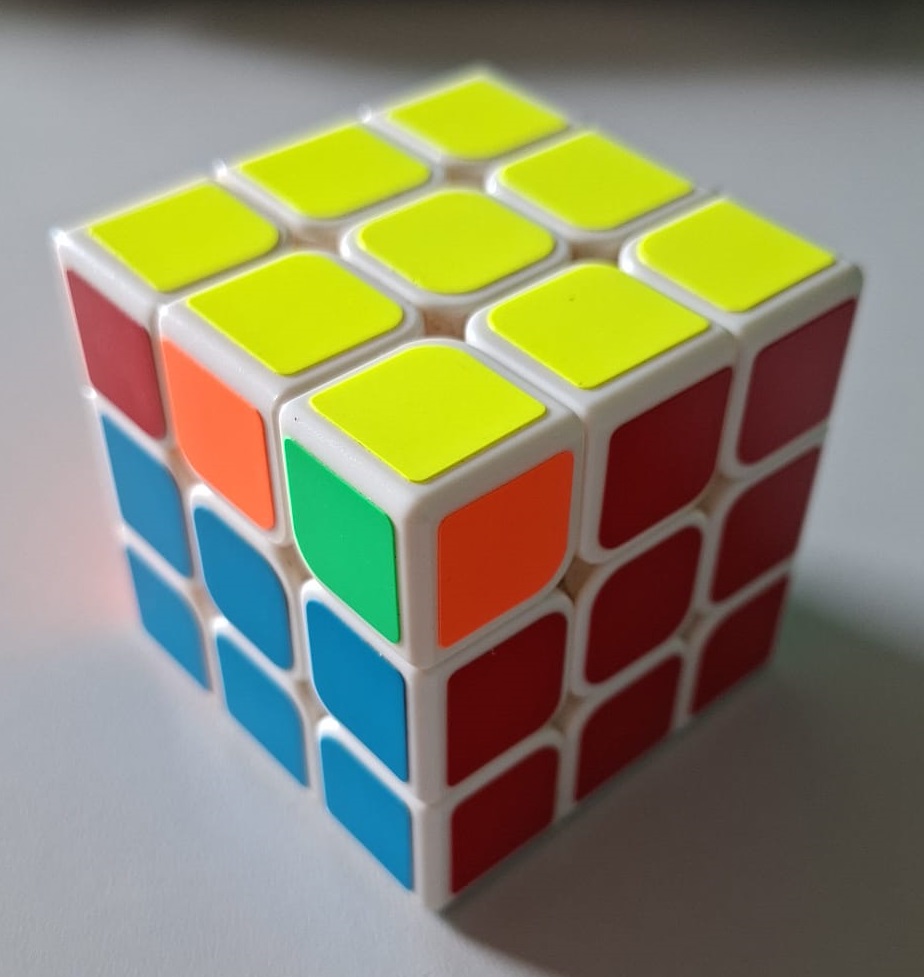
Create the yellow cross
For this step we will use the following algorithm:
F U R U' R' F'
At this point, you will cycle through a number of patterns: for each pattern, rotate the cube to orient the pattern as described below and keep performing the algorithm until
the yellow cross is formed.
- Line: rotate the line to be left to right
- L-shape: rotate the L-shape to be in the back-left corner
Finish the yellow face
To complete the yellow face, use the 'Sune' and 'Anti-Sune' algorithms:
(There seems to be different versions of Anti-Sune...?)
Sune: R U R' U R U2 R'
Anti-Sune: R' U' R U' R' U2 R
Again, you will cycle through a number of patterns: for each pattern, rotate the cube to orient the pattern as described below and keep performing one of the algorithms until
the yellow face is completed.
- Cross: you can choose!
- Cross + 1 corner face: put 1 face in the back-left corner
- Cross + 2 corner faces which are next to each other: put the corner faces at the back
There is more info online about exactly which algorithm to use in which orientation, but this approach is easy and rather efficient to get started.
You can always dig deeper into this step, once you get more advanced.
Step 4
Permutate the last layer
Goal
The last step will of course finish the cube.
It also takes 2 steps: making the 'headlights' and then rotating the edges.
Making the 'headlights'
'Headlights' is when you have the same color faces on 1 side of the top layer.
For example: in the situation below, you can see the blue headlights.
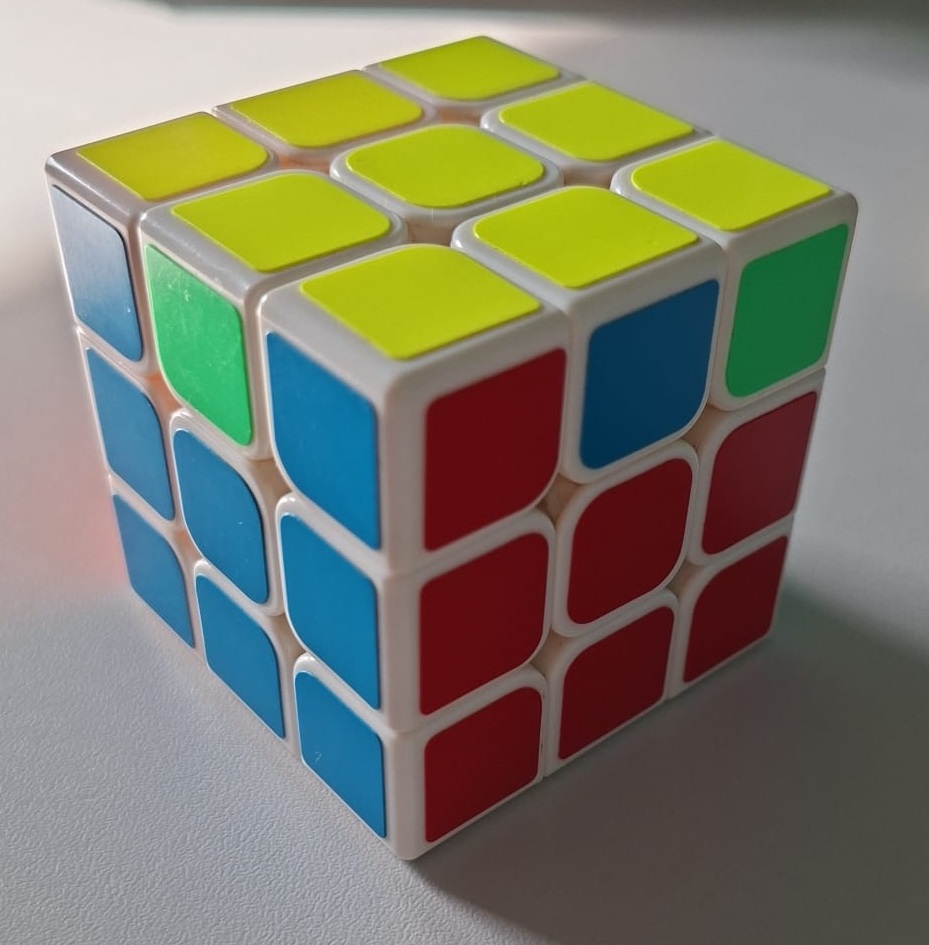
You are going to solve all the headlights, using the following algorithm:
(R' F R') B2 (R F' R') B2 R2
If you already have a pair of headlights, rotate the cube so that the headlights are in the back and perform the algorithm until you have all of them.
(You should have to perform this algorithm 1 or 2 times, but not more than that.)
Rotate the edges
At this point, the cube is almost finished, except for the edges in the top layer.
You will solve this using the following algorithm, which rotates the edges of the left, right and front layer in a clockwise direction:
F2 U (R' L) F2 (R L') U F2
If you have 1 edge which is already in the correct position, rotate the cube so that this edge is in the back and perform the algorithm until all edges are in the correct position.
Again, there are different algorithms for each specific situation, which solve the cube in 1 step. But this approach only requires you to memorize 1 algorithm.
Solved!
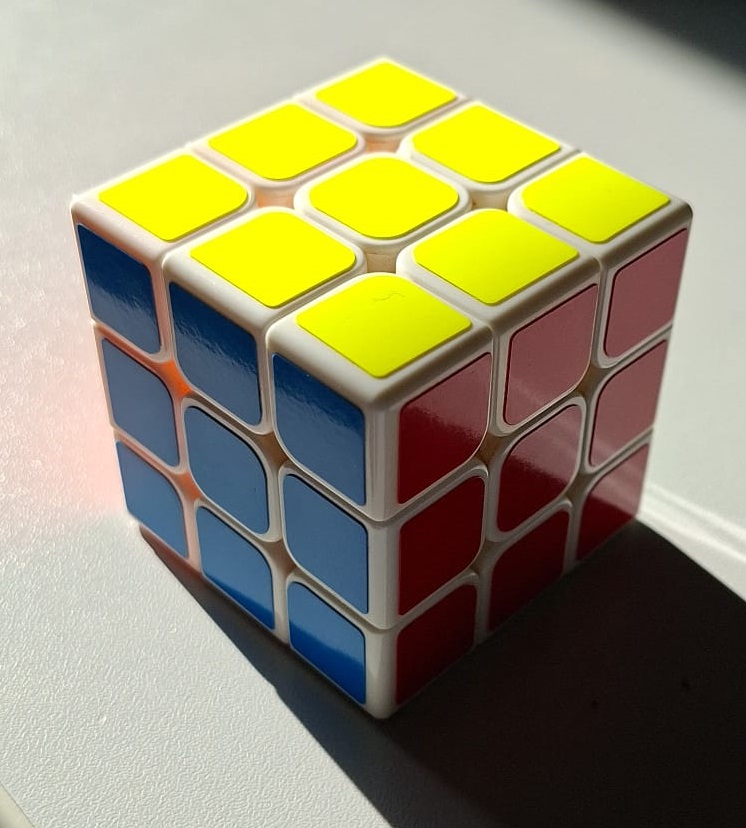
Congratulations, you have solved the cube!
Using this approach, you only need to memorize 4 algorithms, which is great for getting started.
My fastest time using this method is about 1 minute.